How To Insert Picture In Psd Template
In this Quick Tip, I'll show you how to use Adobe Photoshop to add your own custom imagery to a production mock-up purchased from Envato Market place.
Envato Marketplace is an fantabulous resources for stock photos, graphic templates, and product mock-ups. These resources are a keen way to produce high-quality marketing shots in a very short amount of fourth dimension.
Alternatively, if you lot don't have the correct software or are not confident using information technology, consider using Placeit, an online product mockup generator.
Follow along with us over on our Envato Tuts+ YouTube channel, video created past Andrei Stefan.
1. How to Select a Product
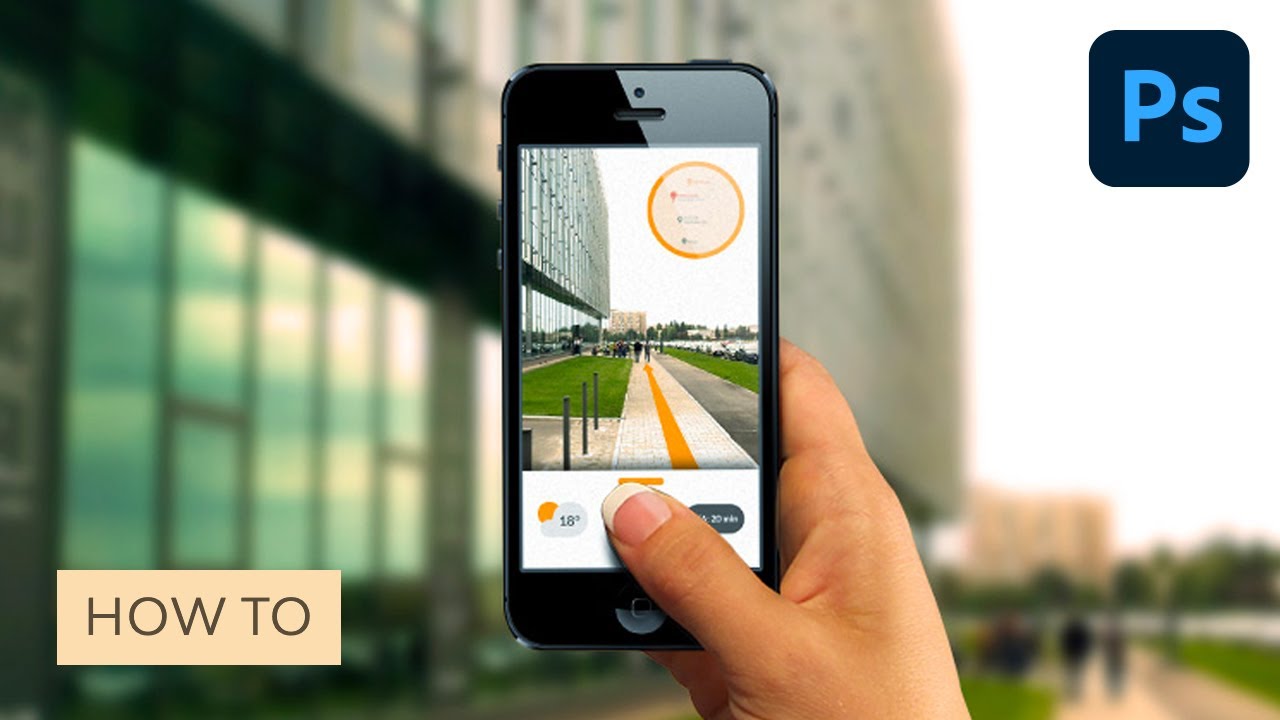
I of the advantages of using a purchased template is that the creators normally provide a very clean, organized file that makes it easy to insert your own imagery. And so for example, if y'all are promoting a new app that uses the device'due south camera and GPS to provide street view directions, what better way to market the app than by showing information technology being used on a device?
Stride 1
At that place are lots of product mock-ups bachelor on the market. The one I chose to use includes a hand property the device.
![mock-up image preview](https://cms-assets.tutsplus.com/cdn-cgi/image/width=850/uploads/users/523/posts/33598/image/mock-up%20image%20preview.jpg)
![mock-up image preview](https://cms-assets.tutsplus.com/cdn-cgi/image/width=630/uploads/users/523/posts/33598/image/mock-up%20image%20preview.jpg)
![mock-up image preview](https://cms-assets.tutsplus.com/cdn-cgi/image/width=360/uploads/users/523/posts/33598/image/mock-up%20image%20preview.jpg)
Step two
Download the zipped binder and extract the separate files from the package. Open the file named Hand1_Transparent.psd in Photoshop. Find that the file has multiple layers and this easily accommodates the process of updating the file to include your own custom imagery.
![example of available mock-up layers](https://cms-assets.tutsplus.com/cdn-cgi/image/width=850/uploads/users/523/posts/33598/image/example-of-layers-available-within-the-mock-up.jpg)
![example of available mock-up layers](https://cms-assets.tutsplus.com/cdn-cgi/image/width=630/uploads/users/523/posts/33598/image/example-of-layers-available-within-the-mock-up.jpg)
![example of available mock-up layers](https://cms-assets.tutsplus.com/cdn-cgi/image/width=360/uploads/users/523/posts/33598/image/example-of-layers-available-within-the-mock-up.jpg)
two. How to Supersede the Background
Footstep one
In our hypothetical ad, the app should show what the device's camera is seeing. The groundwork prototype is within the Smart Object layer labeled EDIT Background. Double-click on the thumbnail to open the contents in its ain certificate.
![example of entering a smart object layer](https://cms-assets.tutsplus.com/cdn-cgi/image/width=850/uploads/users/523/posts/33598/image/example-of-using-the-edit-background-layer-option.jpg)
![example of entering a smart object layer](https://cms-assets.tutsplus.com/cdn-cgi/image/width=630/uploads/users/523/posts/33598/image/example-of-using-the-edit-background-layer-option.jpg)
![example of entering a smart object layer](https://cms-assets.tutsplus.com/cdn-cgi/image/width=360/uploads/users/523/posts/33598/image/example-of-using-the-edit-background-layer-option.jpg)
The file opens—it's called Layer1.psb. Observe that it only has a single layer, the current background image.
![example of entering the background layer](https://cms-assets.tutsplus.com/cdn-cgi/image/width=850/uploads/users/523/posts/33598/image/example-of-entering-the-background-layer.jpg)
![example of entering the background layer](https://cms-assets.tutsplus.com/cdn-cgi/image/width=630/uploads/users/523/posts/33598/image/example-of-entering-the-background-layer.jpg)
![example of entering the background layer](https://cms-assets.tutsplus.com/cdn-cgi/image/width=360/uploads/users/523/posts/33598/image/example-of-entering-the-background-layer.jpg)
Step 2
Get to File > Place Linked and select a new photo as the background for the advertizing. I've called a street view from my ain photos.
![example of changing the default background](https://cms-assets.tutsplus.com/cdn-cgi/image/width=850/uploads/users/523/posts/33598/image/example-of-changing-the-default-background.jpg)
![example of changing the default background](https://cms-assets.tutsplus.com/cdn-cgi/image/width=630/uploads/users/523/posts/33598/image/example-of-changing-the-default-background.jpg)
![example of changing the default background](https://cms-assets.tutsplus.com/cdn-cgi/image/width=360/uploads/users/523/posts/33598/image/example-of-changing-the-default-background.jpg)
Footstep 3
Go to File > Relieve and and then close the file. The contents of the groundwork in the initial file update to reverberate the new groundwork. Observe that the file automatically adds a blur and colorization effect to the new groundwork also.
![example of changed background](https://cms-assets.tutsplus.com/cdn-cgi/image/width=850/uploads/users/523/posts/33598/image/example-of-changed-background.jpg)
![example of changed background](https://cms-assets.tutsplus.com/cdn-cgi/image/width=630/uploads/users/523/posts/33598/image/example-of-changed-background.jpg)
![example of changed background](https://cms-assets.tutsplus.com/cdn-cgi/image/width=360/uploads/users/523/posts/33598/image/example-of-changed-background.jpg)
three. How to Replace the App Interface
Footstep 1
The interface is updated with the same method. Double click on the EDIT OBJECT layer thumbnail to open up that Smart Object.
![example of using the edit object layer](https://cms-assets.tutsplus.com/cdn-cgi/image/width=850/uploads/users/523/posts/33598/image/example-of-using-the-edit-object-layer-to-change-the-app-interface.jpg)
![example of using the edit object layer](https://cms-assets.tutsplus.com/cdn-cgi/image/width=630/uploads/users/523/posts/33598/image/example-of-using-the-edit-object-layer-to-change-the-app-interface.jpg)
![example of using the edit object layer](https://cms-assets.tutsplus.com/cdn-cgi/image/width=360/uploads/users/523/posts/33598/image/example-of-using-the-edit-object-layer-to-change-the-app-interface.jpg)
Stride two
That file, chosen Camera.psb, includes two layers. There's a subconscious layer for a white version of the device, and the currently visible black version. Both of these are too Smart Objects. So they are smart objects within smart objects—that's like Smart-Object-ception! Double click the thumbnail for the darker-colored device to dig another level deeper and open that file.
![example of expanding the smart object](https://cms-assets.tutsplus.com/cdn-cgi/image/width=850/uploads/users/523/posts/33598/image/example-of-expanding-the-smart-object-layer.jpg)
![example of expanding the smart object](https://cms-assets.tutsplus.com/cdn-cgi/image/width=630/uploads/users/523/posts/33598/image/example-of-expanding-the-smart-object-layer.jpg)
![example of expanding the smart object](https://cms-assets.tutsplus.com/cdn-cgi/image/width=360/uploads/users/523/posts/33598/image/example-of-expanding-the-smart-object-layer.jpg)
Pace 3
That file, called Camera1.psb, contains the dissimilar layers used to illustrate the device and another Smart Object named REPLACE CONTENTS for the screen. Double-click on that thumbnail to open that file.
![example of using the replace contents layer](https://cms-assets.tutsplus.com/cdn-cgi/image/width=850/uploads/users/523/posts/33598/image/example-of-using-the-replace-contents-layer.jpg)
![example of using the replace contents layer](https://cms-assets.tutsplus.com/cdn-cgi/image/width=630/uploads/users/523/posts/33598/image/example-of-using-the-replace-contents-layer.jpg)
![example of using the replace contents layer](https://cms-assets.tutsplus.com/cdn-cgi/image/width=360/uploads/users/523/posts/33598/image/example-of-using-the-replace-contents-layer.jpg)
Step four
This new file, chosen Screen11.psb, contains the bodily screen prototype. Insert the new app interface image with File > Place Linked.
![example of changing the app interface image](https://cms-assets.tutsplus.com/cdn-cgi/image/width=850/uploads/users/523/posts/33598/image/example-of-changing-the-app-interface.jpg)
![example of changing the app interface image](https://cms-assets.tutsplus.com/cdn-cgi/image/width=630/uploads/users/523/posts/33598/image/example-of-changing-the-app-interface.jpg)
![example of changing the app interface image](https://cms-assets.tutsplus.com/cdn-cgi/image/width=360/uploads/users/523/posts/33598/image/example-of-changing-the-app-interface.jpg)
Step 5
Save and close each of the open smart object files. At that place should be three of them: Screen11.psb, Camera1.psb, and Camera.psb. The original file is now updated with the new interface seamlessly incorporated into the shot.
![example of adjusted mock-up](https://cms-assets.tutsplus.com/cdn-cgi/image/width=850/uploads/users/523/posts/33598/image/example-of-adjusted-mockup.jpg)
![example of adjusted mock-up](https://cms-assets.tutsplus.com/cdn-cgi/image/width=630/uploads/users/523/posts/33598/image/example-of-adjusted-mockup.jpg)
![example of adjusted mock-up](https://cms-assets.tutsplus.com/cdn-cgi/image/width=360/uploads/users/523/posts/33598/image/example-of-adjusted-mockup.jpg)
That's It!
It actually is that elementary! Merely updating the smart objects within the template hands creates a customized marketing shot. Keep in heed that the file is still editable, so you lot tin swap out the contents of the smart objects at any time to update the image with new backgrounds and new app interfaces.
![finished mock-up preview](https://cms-assets.tutsplus.com/cdn-cgi/image/width=850/uploads/users/523/posts/33598/image/finished-mock-up-preview.jpg)
![finished mock-up preview](https://cms-assets.tutsplus.com/cdn-cgi/image/width=630/uploads/users/523/posts/33598/image/finished-mock-up-preview.jpg)
![finished mock-up preview](https://cms-assets.tutsplus.com/cdn-cgi/image/width=360/uploads/users/523/posts/33598/image/finished-mock-up-preview.jpg)
Placeit: The Toolless Alternative
Placeit is a simple and easy-to-apply online mockup generator with over11,000 Smart Templates to pick from. No Photoshop skills needed because everything you lot demand to practise is on the online tool. It doesn't get any quicker than this.
Phone Mockup on Placeit
![](https://cms-assets.tutsplus.com/cdn-cgi/image/width=850/uploads/users/2273/posts/25254/image/PhoneMockup.jpg)
![](https://cms-assets.tutsplus.com/cdn-cgi/image/width=630/uploads/users/2273/posts/25254/image/PhoneMockup.jpg)
![](https://cms-assets.tutsplus.com/cdn-cgi/image/width=360/uploads/users/2273/posts/25254/image/PhoneMockup.jpg)
![](https://cms-assets.tutsplus.com/cdn-cgi/image/width=850/uploads/users/2273/posts/25254/image/Phone.jpg)
![](https://cms-assets.tutsplus.com/cdn-cgi/image/width=630/uploads/users/2273/posts/25254/image/Phone.jpg)
![](https://cms-assets.tutsplus.com/cdn-cgi/image/width=360/uploads/users/2273/posts/25254/image/Phone.jpg)
Merely finished going through this quick tutorial, and experience like learning more than of what it takes to go a visual creative? Well, if that'due south the case, then you're in luck since I've put together a trivial list which should get you up and going in no time!
-
10 Free Mockups Available on Placeit (T-Shirt, iPhone, and More!)
-
22 Best Hat Mockups (Using a Hat Mockup Generator)
-
nineteen All-time Magazine Cover Designs You Tin Personalise (With a Magazine Generator)
-
How to Brand a Rap Album Encompass Fine art (Using an Album Cover Maker)
-
How to Make a Flyer Online With a Flyer Creator (Without Photoshop!)
-
How to Create a Quick Teaser Video for a Blog Post (With a Placeit Template)
-
How to Make a Quick Tutorial Video (Blithe Slideshow) With Placeit
-
How To Make a YouTube Intro Video Online With Placeit Templates
-
xx Cool Gaming Logos: Team + Video Games (Online Design Creator)
-
25 Best iPhone Mockups & Templates
Source: https://design.tutsplus.com/tutorials/how-to-insert-a-photo-into-a-product-mock-up-in-adobe-photoshop--cms-25254
Posted by: raysusuct.blogspot.com
0 Response to "How To Insert Picture In Psd Template"
Post a Comment